Wellfire Interactive // Expertise for established Django SaaS applications
Editing image uploads with Python
Ditch Photoshop: making on-the-fly edits and enhancements to images using Python.
Last week the Refresh DC community had the opportunity to listen to some of the supremely talented folks at nclud discuss their latest redesign, from concept to technical implementation. They pushed a lot of boundaries developing a highly interactive front-end, and in addition to that creative work they needed to develop some specialized functionality in WordPress to support their design without tedious content updates.
Some of these things included making edits to uploaded images on upload so they could be reused in multiple ways and to reduce the need for funky manual preprocessing. Things like resizing, blurring, and even recolorizing.
I was curious what steps would be required to implement similar functionality in Python. So with my REPL at the ready and the estimable Python Imaging Library (PIL) on my path I wrote a few lines to get us started.
Open an Image object

A bed of tulips at night. Our base image.
You can open an image from a file via a file path string or a file object. For simplicty, we’ll just a file path.
import Image
flowers = Image.open("flowers.jpg")
Resizing images
Resizing images with PIL is straightforward. The resize method takes a size argument (a tuple of width and height for the new image) and an optional filter argument which dictates how PIL will scale the image.
The default filter is to use nearest neighbor scaling. Here’s the code and the result:
nearest = flowers.resize((flowers.size[0] / 2, flowers.size[1] / 2)).save(
        "flowers-half-nearest.jpg")
We can get an improvement using the ANTIALIAS scaling filter:
antialiased = flowers.resize((flowers.size[0]/2, flowers.size[1]/2),
        Image.ANTIALIAS).save("flowers-half-antialias.jpg")
Resizes don’t have to make the image smaller or be done proportionally of course.
squished = flowers.resize((flowers.size[0], flowers.size[1] / 2),
        Image.ANTIALIAS).save("flowers-stretch-antialias.jpg")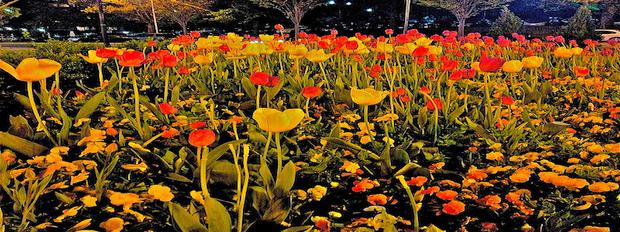
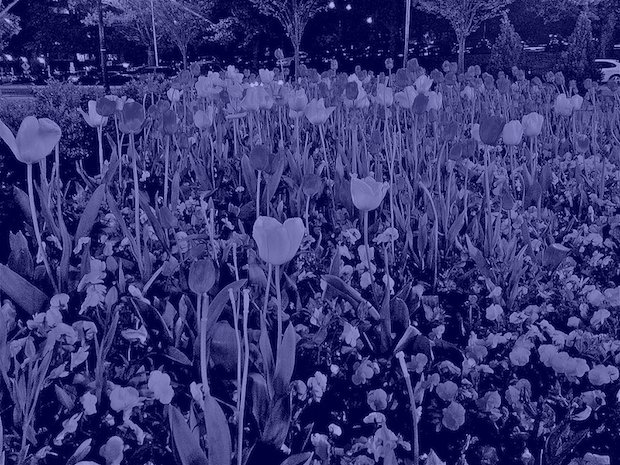
Recolorizing with an overlay
The next problem is recolorizing an image. Let’s say you want to upload some images and get monochromatic copies for some purpose of your choosing.
The first way I thought about doing this was to strip all color from the base image and then use a single color layer with an alpha value. Kind of like holding a colored transparency sheet over a black and white photo.
This 3-line function creates a single color layer and returns a composite image by blending that single color layer with the base layer.
To return an image with a dark blue color scheme, we’ll specify a dark blue using its hex code and set an alpha value:
overlay = image_overlay(im, color="#0000CC", alpha=0.3)And we’ll get this result. Note that the image quality will partially depend on the file type you choose for export. This file is in PNG format; the result was noticeably superior to the resulting JPEG.
Explicitly recolorizing images
The previous method works, but it feels a bit too hackish. What if we could more direcly change the color balance of the source image, instead of mucking about with layers?
PIL ships with the ImageOps module, from which the colorize function
will prove helpful. This function replaces black and white pixel values
with the colors we specify. The base image must be a grayscale image, in
“L” mode, so we’ll make it grayscale first.
Picking a couple values of blue with our function like so:
recolorized = image_recolorize(im,
        black="#000066", white="#9999CC")
Results in this image.
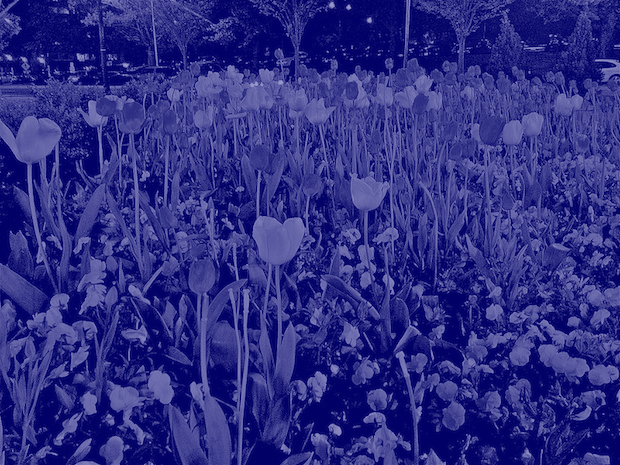
Obviously we need to do some more work to figure out which colors to use in both examples to get a closer match. However it doesn’t appear like there’s much lost in the way of brightness or contrast by using the overlay method, so if you want a monochromatic image, the overlay method is probably the best way to get the desired result without too much color testing.
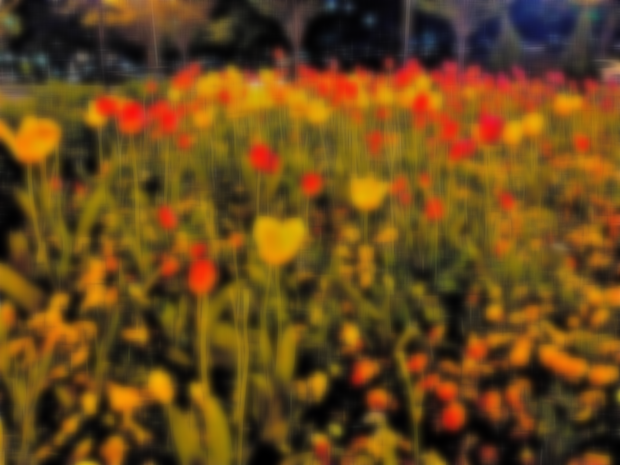
It’s all a blur
Now what if we want to blur an image? This might be helpful for
indicating perspective or beer goggles. For this we’ll use PIL’s
ImageFilter module.
import ImageFilter
blurred = flowers.filter(ImageFilter.BLUR)
And here’s our basic blurred image:

Now with a Gaussian blur:
blurred = flowers.filter(ImageFilter.GaussianBlur)
In PIL version 1.1.5 the Gaussian blur filter has a hard coded radius value, but there’s an easy work around:
Now we can set an aggressive blur radius:
blurred = flowers.filter(MyGaussianBlur(radius=10))Now we have the world through beer googles.
Thumbnails and custom filters
There’s a lot more you can do with PIL. For most CMS needs it’s the resizing module that will be most useful, and there are various CMS and framework specific libraries that provide great intermediary interfaces (e.g. easy_thumbnails for Django).
PIL’s thumbnail function is very similiar to the resize function, but
instead of returning an image based on the specified dimensions, it uses
those dimensions as a limit and returns an image with the same aspect
ratio as the original.
In this code, the resultant image thumb will have the same aspect
ratio as the source image flowers and it’s longest dimension will be
no more than 100 pixels long. As with the resize function we can
accept the default scaling filter or specify one.
thumb = flowers.thumbnail((100, 100), Image.ANTIALIAS)One quick tip for testing your code or parameters in the interpreter:
you can use the show method to view the image using your systems
default image viewer (e.g. Preview on Mac OS).
myimage.show()And there’s no need to stop at blurring images. The ImageFilter module
has additional filters, and as you can see from the previous example,
they can be extended as you need. If you need to do more advanced image
editing you can always enlist numpy for its efficient matrix handling.
You can find detailed documentation in the Python Imaging Library
Handbook.